To provide high-quality technical inspection and non-destructive testing (NDT) of subsea and underground pipeline sections our company has developed a special hardware-and-software line of devices named KMD. This is a unique solution in the modern market of non-destructive testing systems, which is based on magnetometric diagnostics.
The method allows to register changes in the magnetic field in the places where defects and stress-strain states (SSS) are located. The use of KMD devices will make it possible for your company to determine general technical condition of the inspected object and prevent occurrence of emergency situations.
Our Competitive Advantages
- Detection of SDS
- Applicability on steel pipelines of any type and purpose
- Without stopping or reducing the volume of transportation of product - without re-equipment of the pipeline - without cleaning and calibration of the pipe
- High capacity - up to 20km/day
- Reliability of detectable defects up to 93%
- Diagnostics at a distance of up to 10 pipe diameters
- Diagnostics of areas inaccessible for in-pipe and other contact methods, including those closed by bottom sediments
- Real-time anomaly detection
KMD Devices

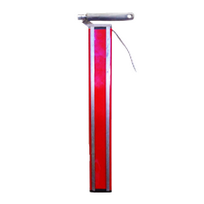
KMD-01 is designed for non-contact magnetometric diagnostics of underground pipelines. Systems of non-contact magnetometric diagnostics are developed on the basis of three-component magnetoresistive nanofilm sensors allowing to measure conditions of high electromagnetic interferences.
During the survey, the operator moves the vertically oriented instrument along the pipeline route. All received data are graphically displayed on the field computer screen in the online mode. After completion of the diagnostics, an express data analysis is performed, within which the points for verification diging are selected (the number of pits is determined together with the Customer). The purpose of diging is to obtain more accurate information from the pipeline and to improve the quality of processing. Further, the analytical center performs a multi-disciplinary data analysis using artificial intelligence technologies. Based on the results of the work, a report on the technical condition of the pipeline is prepared.
Additional technical information aboutthe KMD-01 >>>
|
Parameter |
Specification |
|---|---|
|
Type of sensors (primary transducers) |
Nano-size sensors based on the Anisotropic Magneto-Resistance effect (AMR). Each sensor consists of magneto-resistance layer made of Fe-Ni-CO layer, with the thickness of 30 nM (nano-Meter, 10-9m) |
|
Amount of measured parameters of the magnetic field |
16 |
|
Sampling speed |
Up to 300 samples per second |
|
Types of detectable defects |
|
|
Depth of detectable defects |
starting from 15 to 100 % of pipe wall thickness |
|
Determination of pipeline bedding depth |
Up to 10 diameters of the inspected pipe |
|
Requirements to the surface under inspection |
preparation of the surface and changes in pipeline operation mode - Not required |
 KMD-02D
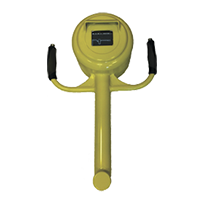
KMD-02D is designed for non-contact magnetometric diagnostics of subsea pipelines at depths up to 60 meters. Systems of non-contact magnetometric diagnostics are developed on the basis of three-component magnetoresistive nanofilm sensors that allow to measure conditions of high electromagnetic interferences.
During the survey, the diver moves the vertically oriented instrument along the pipeline route. All received data are graphically displayed on the screen of the device online. The device design allows the diver to enter a number of markers into the file directly during the survey. All received materials are recorded on a flash memory card.
In case of technical capability, verification diging is carried out based on the diagnostic results in order to obtain more accurate information about the pipeline and improve the quality of processing. Further, the analytical center performs a multi-profile data analysis using artificial intelligence technologies. Based on the results, a report on the technical condition of the pipeline is prepared.
Additional technical information aboutthe KMD-02D >>>
|
Parameter |
Specification |
|---|---|
|
Type of sensors (primary transducers) |
Nano-size sensors based on the Anisotropic Magneto-Resistance effect (AMR). Each sensor consists of magneto-resistance layer made of Fe-Ni-CO layer, with the thickness of 30 nM (nano-Meter, 10-9m) |
|
Amount of measured parameters of the magnetic field |
16 |
|
Sampling speed |
Up to 300 samples per second |
|
Types of detectable defects |
|
|
Depth of detectable defects |
starting from 15 to 100 % of pipe wall thickness |
|
Determination of pipeline bedding depth |
Up to 10 diameters of the inspected pipe |
|
Requirements to the surface under inspection |
preparation of the surface and changes in pipeline operation mode - Not required |

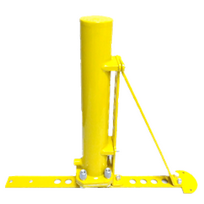
KMD-02R is designed for non-contact magnetometer diagnostics of underwater pipelines at depths up to 1200 m. Complexes of non-contact diagnostics are developed on the basis of three-component magnetoresistive nanofilm sensors that allow to measure conditions of high electromagnetic interference.
Before starting work our specialists together with ROV technical team install the device on the device with maximum distance from its metal parts. In the process of diagnostics ROV with the device connected moves along the pipeline route. At the moment of measurement the received data are transmitted via cable to the ROV control center located on the accompanying ship. If it is technically possible, verification diging is carried out based on the diagnostics results in order to obtain more accurate information about the pipeline and to improve the quality of processing. Further, the analytical center performs a multi-profile data analysis using artificial intelligence technologies. Based on the results, a report on the technical condition of the pipeline is prepared.
Additional technical informationabouttheKMD-02R >>>
|
Parameter |
Specification |
|---|---|
|
Type of sensors (primary transducers) |
Nano-size sensors based on the Anisotropic Magneto-Resistance effect (AMR). Each sensor consists of magneto-resistance layer made of Fe-Ni-CO layer, with the thickness of 30 nM (nano-Meter, 10-9m) |
|
Amount of measured parameters of the magnetic field |
16 |
|
Sampling speed |
Up to 300 samples per second |
|
Types of detectable defects |
|
|
Depth of detectable defects |
starting from 15 to 100 % of pipe wall thickness |
|
Determination of pipeline bedding depth |
Up to 10 diameters of the inspected pipe |
|
Requirements to the surface under inspection |
preparation of the surface and changes in pipeline operation mode - Not required |
 KMD-03
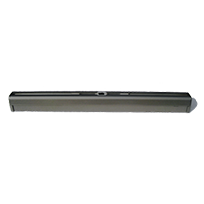
In the course of diagnostics, the operator moves the complex vertically along the entire circumference of the pipeline, receiving a map of the magnetization of the pipe, corresponding to the capture strip of the device. At detection of areas of change of a magnetic field, the expert allocates them with a marker directly on a body of the pipeline. Further, the selected areas are carefully examined by standard methods of nondestructive testing to determine the type of defect detected and the exact wall thickness of the pipeline in this place. Based on the results of the work, a report on the technical condition of the pipeline is prepared.
Additional technical information abouttheKMD-03 >>>
|
Parameter |
Specification |
|---|---|
|
Type of sensors (primary transducers) |
Sub-contact sensors of the magnetic field |
|
Amount of sensors |
14 |
|
Amount of measured parameters of the magnetic field |
1 in 14 points |
|
Sampling speed |
20-100 |
|
Types of detectable defects |
|
|
Depth of detectable defects |
Starting from 15 to 100 % of pipe wall thickness |
|
Requirements to the surface under inspection |
Preparation of the surface and changes in pipeline operation mode - Not required |
|
Rate of inspection |
Up to 150 m2/day |
|
Admissible distance between the magnetometer and a the inspected surface |
Up to 40 mm |
